Marisol shows us how to adapt a Feldherr foam bag to carry magnetized miniatures safely in trays in this article.
In this article, I want to show you in an easy way how to adapt a Feldherr foam bag to carry magnetized miniatures safely. For this tutorial, I have chosen a small bag (275 mm x 172 mm) with a capacity for two infantry foams, a total of 32 minis.
MATERIALS and TOOLS
- 0.5 cm thick cardboard
- Eva rubber (in our case, black).
- Magnetic adhesive rubber.
- Cutter.
- Ruler.
- White glue or polystyrene glue.
- Small tips
The idea that I present to you is to make a light structure with adaptable trays magnetized to transport the miniatures without foams.
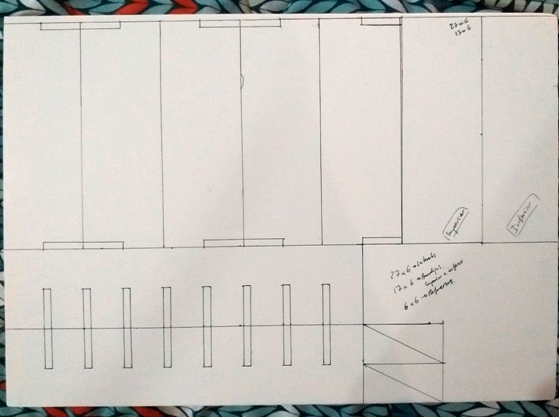
STEP 1 – Choice of measures
We will begin by drawing the different parts of the structure on the foam board. The measurements we will use are based on those of the case, 275 mm x 172 mm. Keep in mind that the sizes may vary in the briefcase case; being made of fabric, the measurements are not exact. These measures that we will use are specific for one of the bags that I have; in another one, it would not fit.
The measurements are as follows:
- SIDES: 26x6cm
- BOTTOM AND TOP AND BOTTOM SIDES: 17x6cm
- ANGULARS: 3x6cm
Note: Both the trays and the sides will be cut 3x05cm so that they can fit without any problem. On the sides, we will make these cuts every 3cm of distance. These measures are indicative and are left to each one’s free choice. Also, these measures can change depending on the size of the case you use to transport the miniatures.
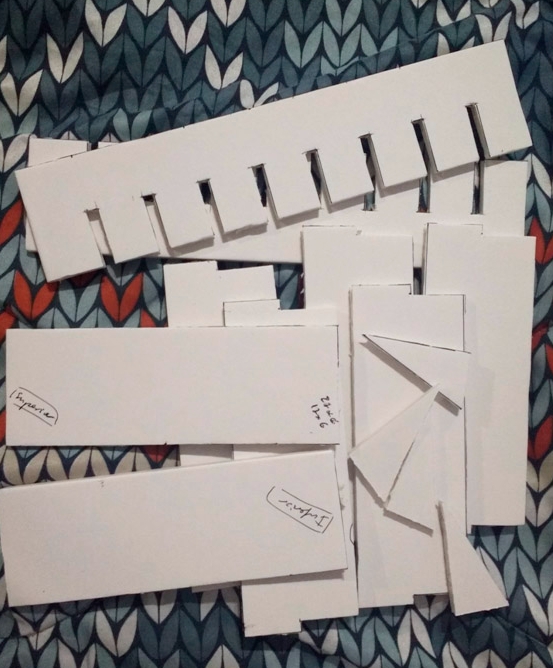
STEP 2 – Iron the measures on the foam board
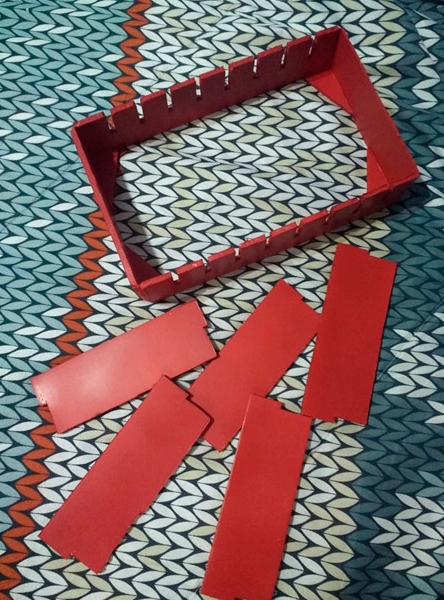
We begin to draw the different parts of our structure on the foam board. An A3 sheet will fit all the features. Although we will not use all the trays, we will make them available in the future to adapt them to the army that we transport. We will also take the opportunity to draw 4 angles to reinforce the rear of the structure. Once removed, all the pieces will be like this:
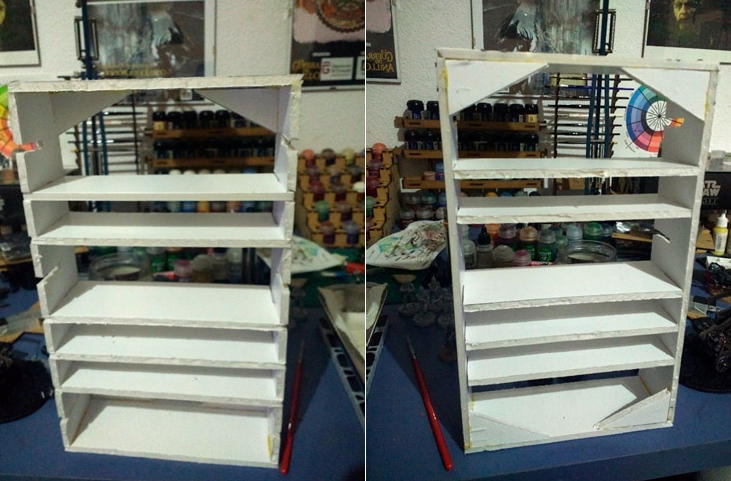
STEP 3 – Cutting and assembling the parts
Now we proceed to cut the pieces and put them on, without gluing anything for the moment to see that everything fits correctly.
To test it correctly, we will use the 5 trays that we have cut to have a more stable structure. To make it easier to glue it, we will leave the trays in place.
The glue I use is this one, obtained from a nearby Asian supplier. It works very well for gluing polystyrene:
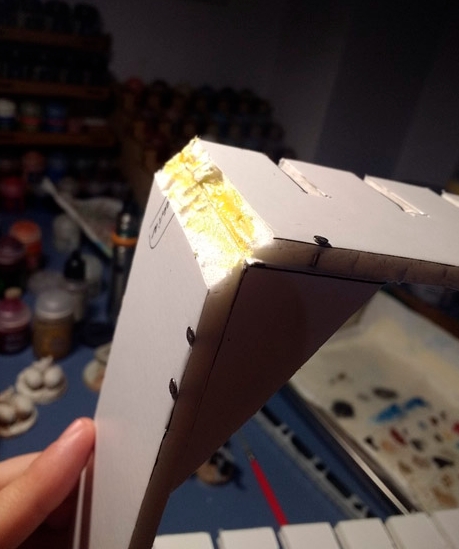
Once the glue is applied, we will choose the best place to put the reinforcement tips on the sides and on the corners.

Once the glue is dry, we will remove the tips from the sides and cut the corners of the sides to give a rounded shape to better fit the Feldherr bag. We will reinforce the cut area with the same glue we have used on the rest of the pieces.
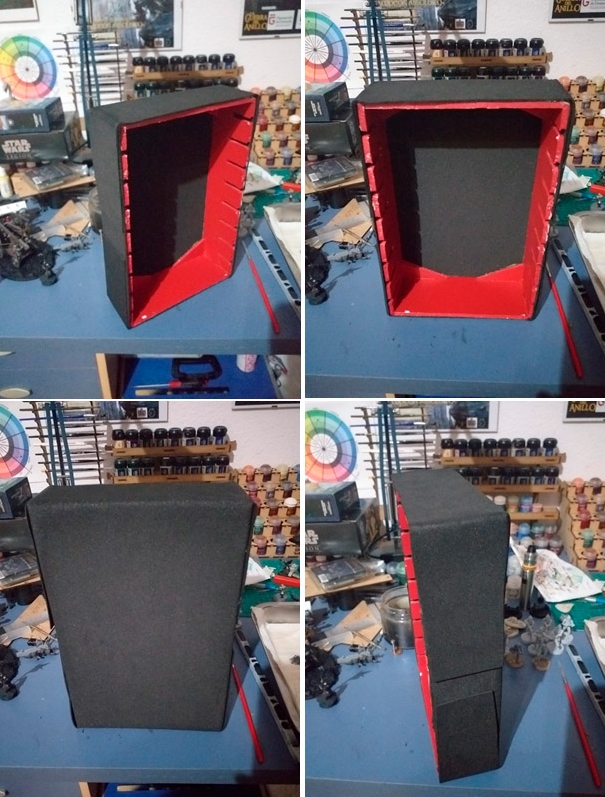
STEP 4 – Painting and placement of the Eva Rubber
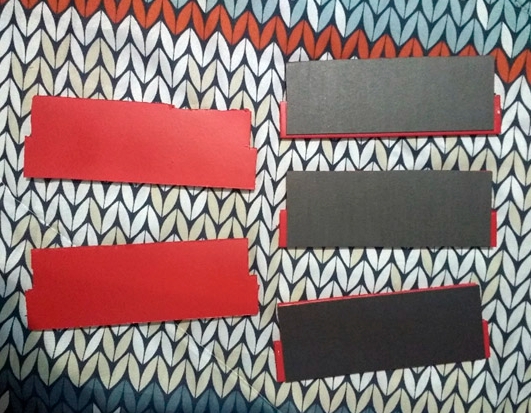
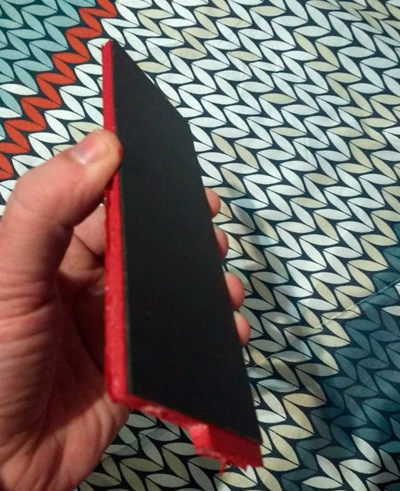
We will continue painting the structure and the trays, cutting and gluing the Goma Eva. We chose black for the Goma Eva and red for the design. The inside of the case is red, and the outside is black. The colors fit perfectly. I have used a red spray to save time, but we can use an airbrush, regular paints …..
The Goma Eva has a decorative purpose, but it will not show the tips and will protect the structure at the time of use and reinforce it.
As you can see, some of the paint has been uncorked when you put the Goma Eva; you can always put masking tape to cover the Goma Eva and give another pass of red spray.
Step 5: Implant the trays.
In this step, we will place the magnetic adhesive rubber. The rubber we have chosen is the one sold by Green Stuff; it is straightforward to cut with scissors and, being adhesive, can be placed in any area very quickly.
We will adjust it so that it does not influence the joints with the sides of the structure.
STEP 6 – Placing the structure in the Feldherr bag
We introduce the structure in the bag to see how it fits; we should not have any problem if we have measured the case well and played with the margin of the fabric.
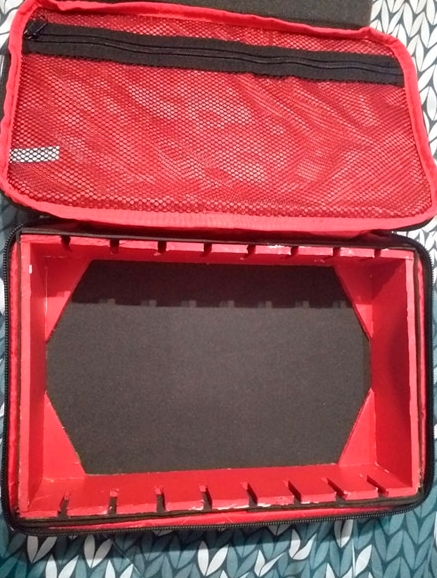
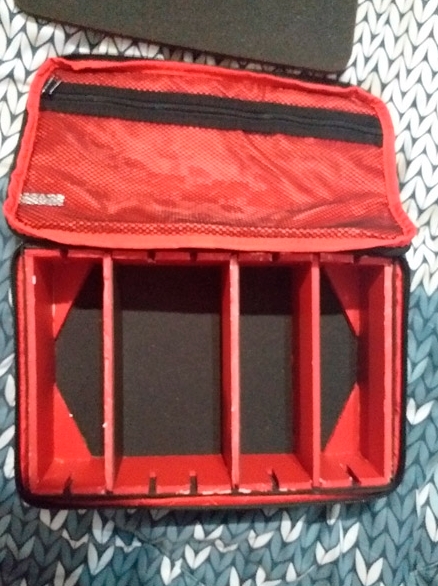
As you can see, it fits perfectly. Although it would be enough to transport it, I would recommend putting foam on the top so that the structure does not dance.
STEP 7 – Implanting the miniatures
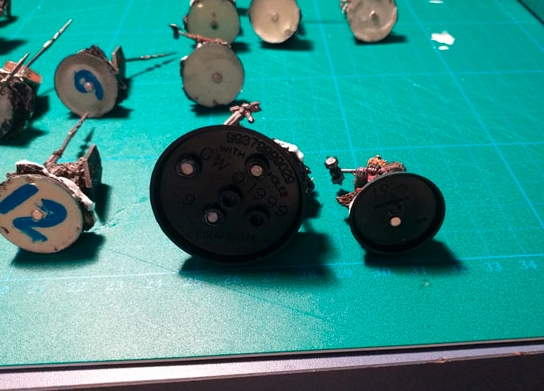
Little I can explain in this step, it only consists of placing magnets on the bases. This has been the most tedious step for me since I usually use resin bases (not to say that all my miniatures use these bases), and to place the magnet, you have to make a small hole.
For resin bases, I use a 2mm drill bit, the same size as the magnets. We make a small hole and introduce the draw with a bit of glue. In the following image, I show you the result, as I said before, something very tedious…
In the standard bases, glue the magnet at the bottom in the area that suits us.
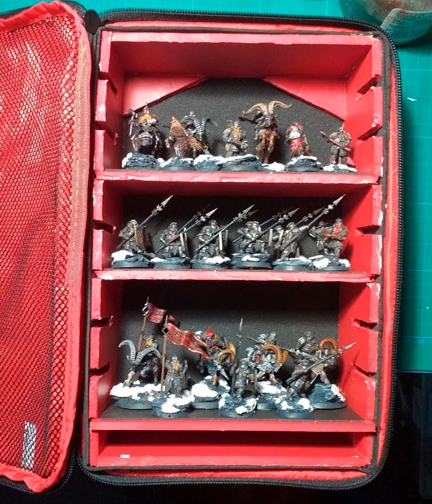
FINAL RESULT
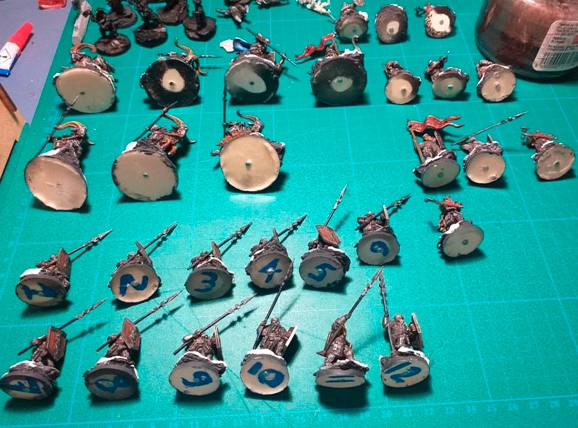
To show you how it looks and is organized, I have mixed both infantry and cavalry miniatures.
Taking into account the measures we have used, we can fit 12 infantry miniatures and 4 cavalry miniatures in a tray. In the latter, we can also take advantage of the space to put some infantry miniatures.
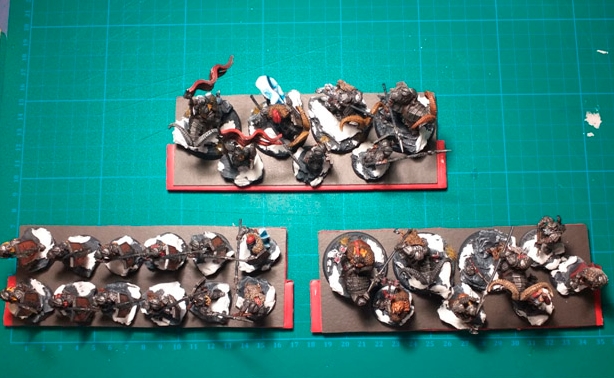
The placement in the structure varies depending on the height of the figures; if we only carry infantry figures, we could add more trays.
The figures don’t come loose. They stay in the case even when it is lying down.
Something fundamental to keep in mind is that the more magnets we put, the more strength it will do. I am not referring to putting more attractions on the bases (which is also true) but to the total amount of magnets in the tray. It is possible that a single miniature placed in the tray moves or does not make good contact; do not panic; this will stop happening when adding more representations in the tray.