Do you want to make a fairy garden but don’t know how? Well, we have the perfect solution! With this tutorial, we will show how to create fake water that looks just like the real thing. This is great for those with limited space or wanting more than one pond in their garden. All it takes are some simple materials and steps to get started!
Are you eager to bring life to your fairy garden, but limited by space or budget? Fear not, for this tutorial shall guide you in the creation of a convincing imitation of water that will leave your guests spellbound. With a few simple materials and steps, you’ll be well on your way to making your fairy garden a magical place!
Materials:
- Two containers of your desired size
- A selection of rocks, both round and flat
- Scissors, needle-nosed pliers, and wire cutters
- A hot glue gun
- Water-resistant sealant or paint (optional)
Instructions:
- Cut the top off one of your containers, using it as a template to trace and cut out the same shape from the second container. Ensure that the two pieces fit together like an hourglass and leave enough room to pour in the rocks.
- Cut strips of foam board about an inch wide to represent the waterline, which curves up towards the center of the hourglass shape. Start by hot gluing the strips in place at one end, leaving a small gap between each strip. Repeat this process, overlapping each subsequent row slightly, until you reach close to the center point. Once complete, apply a coat of sealant or paint to protect the foam board and let it dry thoroughly.
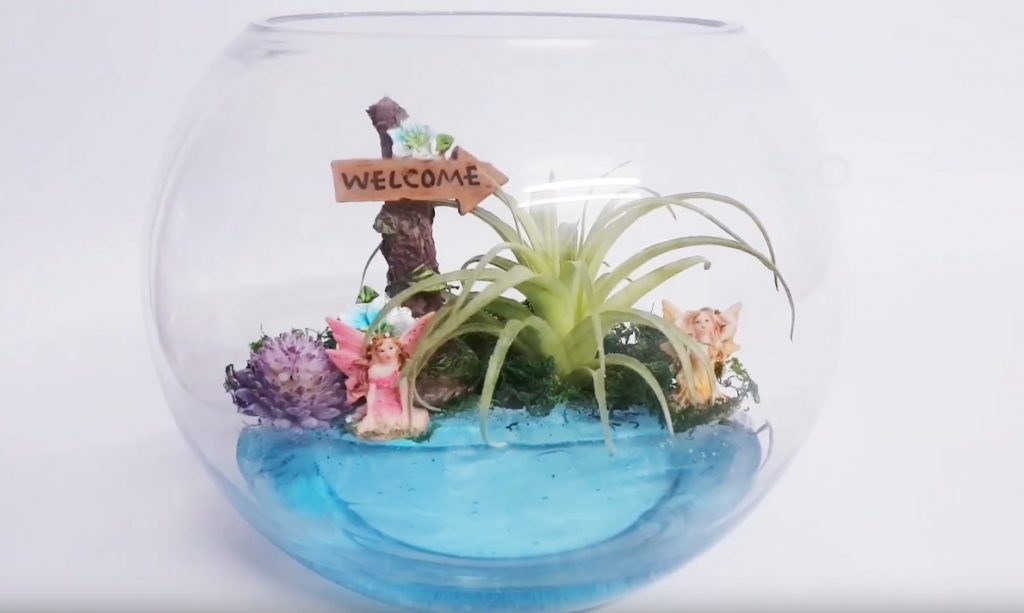
- To add depth and realism to your faux water, consider painting the outer edge a darker color. Be sure to have enough rocks in place before hot gluing them down, as they will be difficult to reposition once dry. Utilize flat stones on top of your container as a landing spot for fairies and other figurines, avoiding the risk of them falling through.
- The possibilities for your fairy garden are endless. Fill the faux water with silk flowers and other decorations, use it as a planter with plastic plants to prevent rotting, or add moss and plants on top of the rocks for extra dimension. Just remember to seal or waterproof everything to ensure its longevity.
- All the materials for this project can be found at your local craft store, often at a reasonable cost. With coupons and sales, you may even be able to complete the project for less than $20!
Tips
But, how do you make sure it looks good? Here are some tips to help you create the perfect fairy garden water feature.
- Add depth with color: Paint the outer edge of your water feature a darker hue to give it dimension and realism.
- Rocks, rocks, rocks: Before you start gluing down rocks, make sure you have enough to cover the entire area. Once they’re dry, they won’t move.
- Flat stones for stability: Place flat stones on top of your container to provide a stable surface for fairies and other small figurines to sit on. This is purely for aesthetics, so feel free to use whatever looks good to you.
- Limited space? No problem: If you don’t have much room to spare, consider creating a smaller water feature that fits inside an hourglass-shaped planter.
- Room for the rocks: When cutting strips for the water line (the part that curves up towards the center), make sure there’s enough room to pour in all the rocks later. Cut strips about an inch wide and hot glue each strip down into place, overlapping slightly until you reach the center.
- Protect your foam board: Once finished, apply sealant or paint to protect the foam board. Allow everything to dry before using.
- Decorative options: Fill your water feature with silk flowers and other decorations or use it as a planter with plastic plants to avoid rotting. Add moss or plants on top of rocks for extra dimension, but make sure everything is sealed or waterproofed.
- The final touch: The two pieces should resemble an hourglass when complete. Pour in the rocks and you’re done!
- Other ideas: Use your fairy garden water feature as a planter, fill it with silk flowers, or add moss or plants on top of rocks.
- Where to buy supplies: You can find everything you need to make a fake water feature for your fairy garden at any craft store. The small pond in the example cost around $20, but be sure to check for coupons and sales to get the best deal.
With these tips in mind, you’ll be able to create a stunning fairy garden water feature that will bring magic and wonder to your miniature world.
Conclusion
In conclusion, with a little creativity and effort, you can make your fairy garden come to life with a stunning imitation of water. Whether you’re looking to add a touch of magic to your indoor or outdoor space, this tutorial is sure to leave you enchanted.