Are you looking to add some terrain variety to your Warpath games? Look no further! In this tutorial, you’ll learn how to craft realistic and imposing rocky cavalry bases. We’ll delve into the three steps required to bring your vision to life. First, we’ll lay the foundation with rocks and glue. Next, we’ll paint the stones to match your gaming table setup with acrylic paints. Finally, we’ll fill any gaps between rocks with a mixture of mud and paint for a seamless look.
INTRODUCTION
The army of Isengard has always been a source of inspiration for me, particularly their horses and cargo. When they pass through my city during campaigns, I can’t help but be struck by the variety of colors and styles they bring with them. This guide will teach you how to create an ambush, so don’t miss out!
MATERIALS AND TOOLS You’ll need:
- Plastic bases
- 2.5 cm thick polyethylene
- Green-Stuff-World electrostatic grass and bushes
- Glue and industrial white glue
- Cutter and Coretta
- Water-based acrylic matte black primer spray
- Vallejo acrylic paints (200 ml tubes)
For lighter browns, mix medium gray, light gray, natural sienna earth, mars violet, and charcoal black.
STEP-BY-STEP INSTRUCTIONS
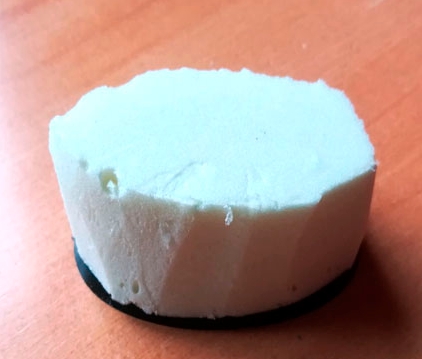
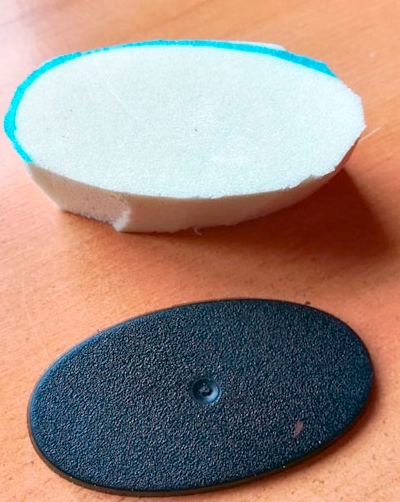
STEP 1: MEASURE AND GLUE THE CORK ON THE BASES
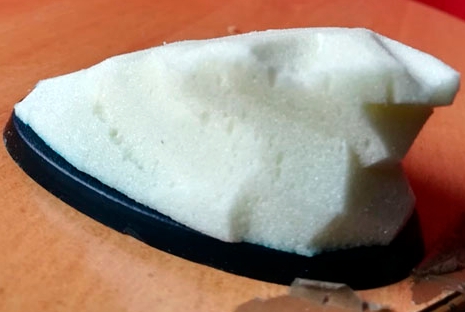
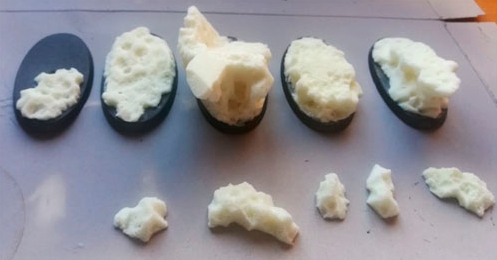
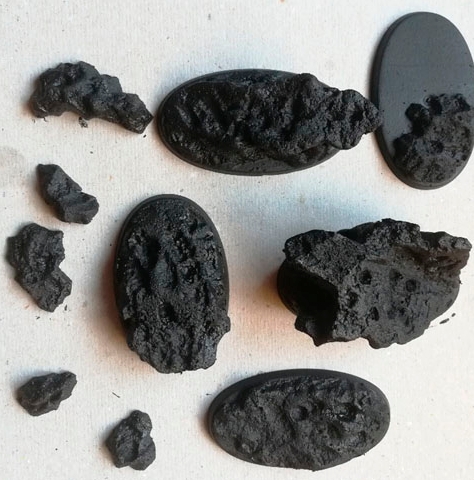
The first step is to glue cork to the bases and then sculpt it to your desired shape. The goal is to create two bases with more rocks to simulate an ambush and others with flatter rocks and loose stones. Use plastic glue, but be aware that it may damage some types of cork. To ensure a secure bond, add weight to the top, 1 kg should suffice.
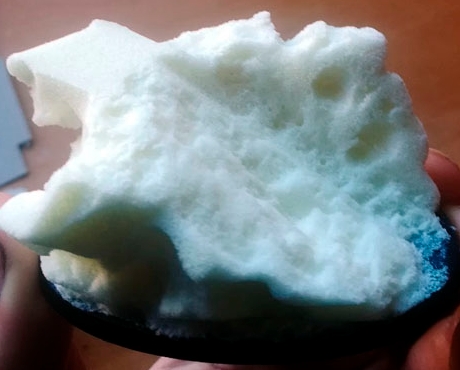
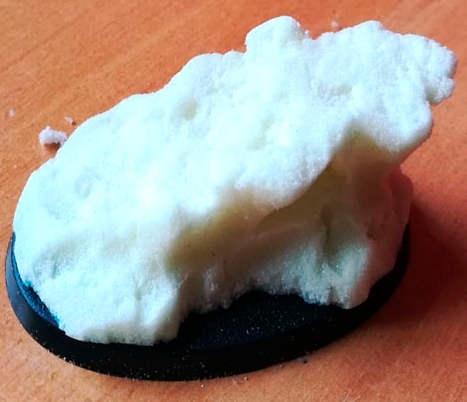
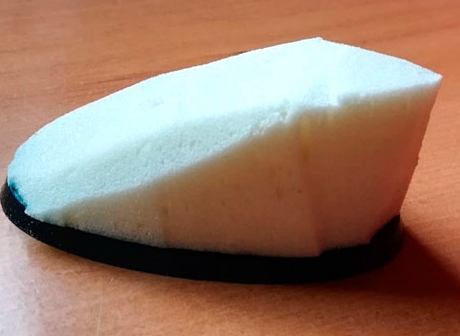
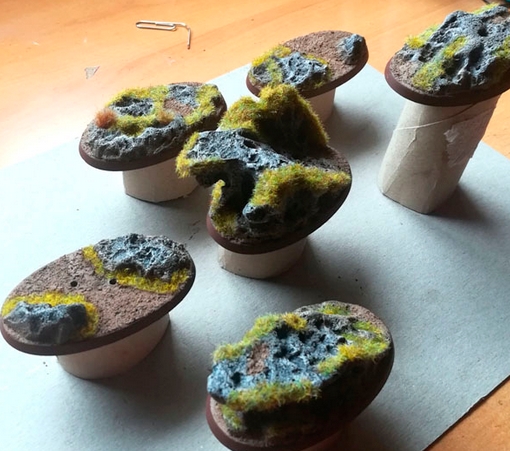
STEP 2: SHAPING
Shape the stone to resemble the rock you want to simulate. Make different cuts with the cutter in various directions and then rough it up with the Coretta. The more cuts and holes your base has, the more realistic it will look once painted.
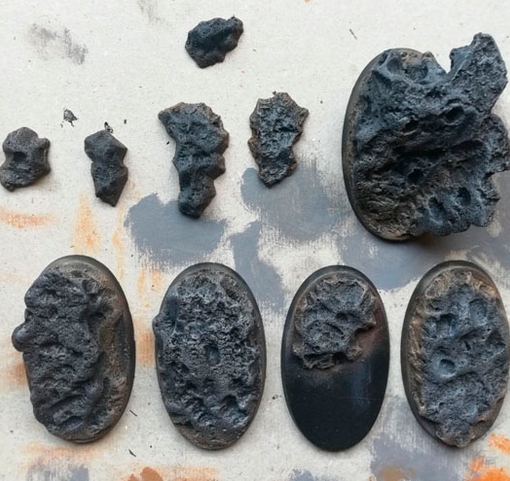
STEP 3: HARDEN THE MATERIAL
This step is crucial to prevent breakage once the material is painted. Mix 25% water and 75% white glue, add a little black paint, and apply two coats. The first coat will dry for 24 hours, and the second will cover any holes or cracks to prevent paint from seeping into the pores.
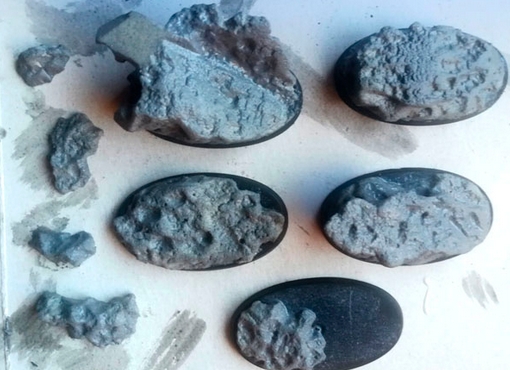
STEP 4: PRIMING AND PAINTING
Prime the bases with black acrylic water-based spray. Fill in any areas missed by the spray with black acrylic paint and a brush. To paint the base, use the dry brush technique. Start with a darker color (gray) and gradually move to a lighter gray. Add a layer of browns at the bottom of the rock, closest to the earth, for added realism. If you make a mistake, simply paint over it with black and start again.
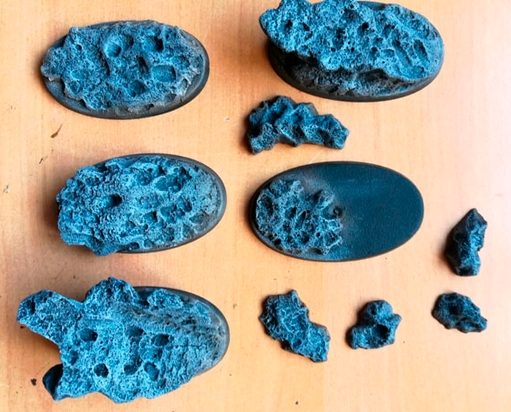
COLOR COATS APPLIED
Base of the rock: Mars violet, natural sienna, and a lighter brown. Rock: Medium gray, light gray, and highlights with soft off-white or off-white.
STEP 6: APPLY VEGETATION
Use different shades of electrostatic grass to create a wintery look (mountains covered in snow). Apply a thin layer of white glue and place the grass with tweezers. Use a ruler rubbed on hair to make the grass look sharp. Add as many bushes as desired. Use modeling sand or paint with sand texture for the sand.

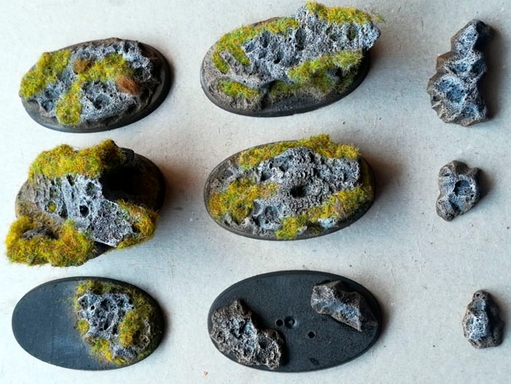
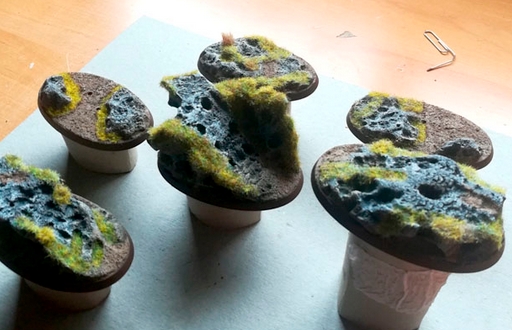
Use natural branches hardened with glue for bushes. Apply a mixture of three different types of electrostatic grass and use Citadel Technical texture paint (Agrellan Badland) for added realism. Paint the edge of the bases with Vallejo matte brown and finish with a spray of matte varnish and water-based Liquitex brand.
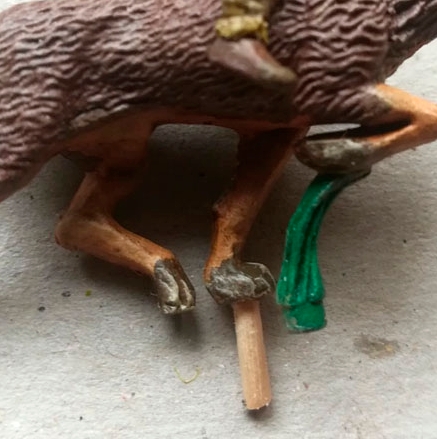
STEP 7: PLACE OUR BEASTS
To keep your miniatures secure on the rock and prevent them from moving, insert a toothpick into one or two of their legs. Heat a paper clip and make a hole, then insert a toothpick and secure with superglue. Miniatures that go directly onto the plastic base do not require a toothpick. You can also add a spear stuck in the rider’s shield for added battle feeling.
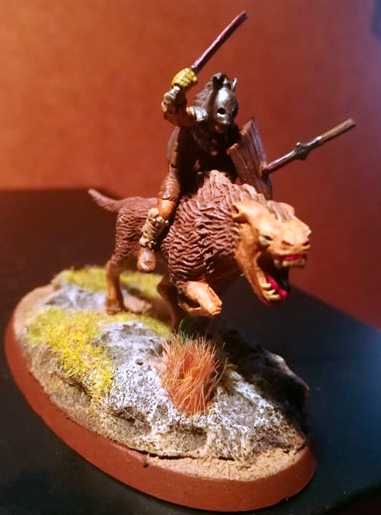
CONCLUSION AND PHOTOS
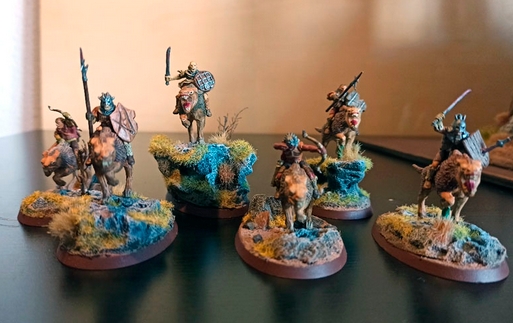
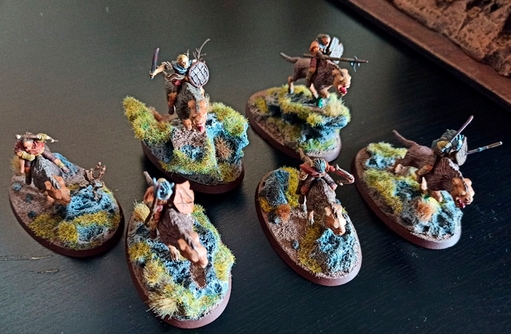
There you have it, your very own ambush of Saruman’s servants, ready to attack the people of Rohan. I hope you enjoyed this guide and found it helpful. If you have any questions, feel free to ask. Thanks to Nuria Ramos for her collaboration and Manuel for the photos.